Accessing the mailbox via the email client (Windows)
MAILBOX 20-025
What you need to know
Besides direct browser access via the Mailbox portal, Helpcard 20-015, you can also set up access to your mailbox via the Outlook app on your laptop or desktop PC.
What you have to do
First check whether the correct version of Outlook has already been installed on your system.
Please ensure that you have installed a version of Outlook that may be used at the university in accordance with the applicable data protection regulations.
Students obtain Outlook from the Internal link opens in the same window:Office Package via Microsoft 365.
HFU employees obtain Outlook from the Internal link opens in the same window:Office Package via the state licence.
Compare the icon of your application - the correct icon of your Outlook version should look like in Figure 1.1.
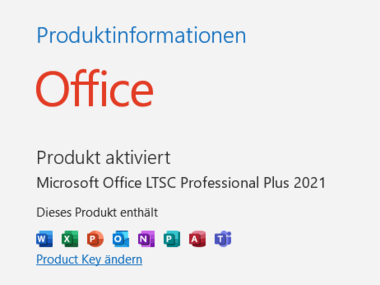
Check your application by opening it and clicking on “File” >> “Office account” to obtain further information. The licence used appears under the heading “Product information”. (see Figure 1.2 - Example of product information for Outlook with country licence).
If you are still unsure about your installed version and/or cannot install it yourself, please contact your faculty IT Department or the IMZ staff.
- 1.1

- 1.2
Start setting up your personal mailbox by clicking on the “Add account” button under “File”.
The account setup dialog is started.
Enter your HFU registration name:
Sample student: xyz12345@stud.hs-furtwangen.de
Sample HFU employees: xyz1234@hs-furtwangen.deConfirm your entry by clicking on “Connect”.
Outlook determines the required configuration in the background and after a waiting period, the “Advanced setup” selection dialog appears.
- 3.1
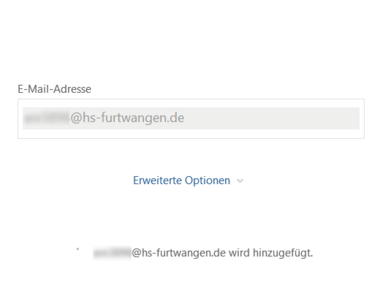 Start the account setup
Enter your email address in the input field.
Click on the “Exchange” button.
You will be redirected to the HFU account login.
- 4.1
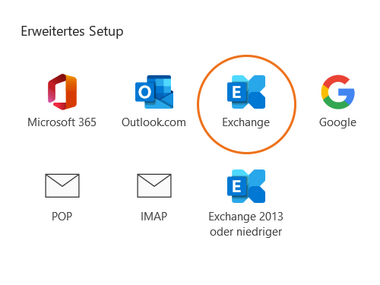 Advanced setup dialog
Click on the “Exchange” entry.
If you are not yet logged in, you will now be taken to the login screen for your HFU account.
Follow the login dialog by entering your login data and performing the MFA as usual. (Fig. 5.1).
By the query “Stay logged in to all your apps”, please deactivate the activated option “Allow my organization to manage my device” and confirm by clicking on “OK”. (Fig. 5.2).
If the “Continue with registration?” dialog appears, please click on the “Continue” button. (Fig. 5.3).
The dialog Account successfully added is displayed.
- 5.1
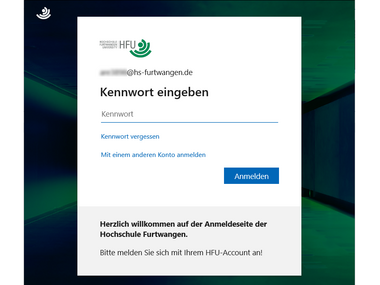 HFU account login
Log in with your HFU account login data.
- 5.2
 “Allow management by organization” query
Deactivate the default setting.
- 5.3
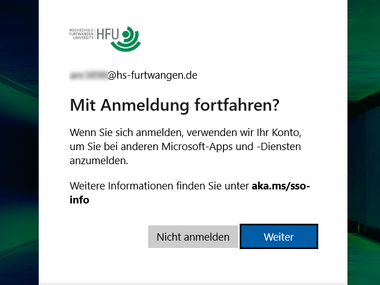 “Continue with login?” dialog
Please proceed with the registration.
Complete the mailbox setup by clicking on “Process completed” and then restart Outlook.
The account has been set up and the mailbox should now be displayed in Outlook. You can now receive, read and write emails.
- 6.1
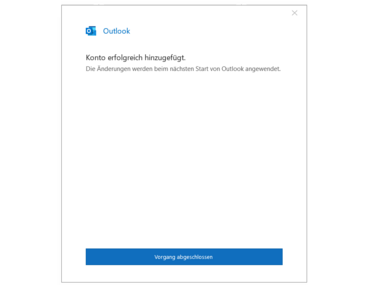 “Account added successfully” dialog
The account setup was successful, you can now complete the process.
Optional, but useful: define Outlook as the default application for opening and sending emails.
Please enter “Standard apps” in the WIndows search field at the bottom left.
Click on the search hit “Default apps” to open the settings window.
Click on the visible program under “E-mail” to open the dialog.
Please select “Outlook” in the dialog.
You have successfully set Outlook as the default application. Email links are now opened with Outlook by default after clicking.