Importing the user certificate into the browser
What you need to know
To work on the University Internal Portal (HIP), you need a user certificate so that you can sign applications and documents by digital signature in HIP.
Importing your certificate is necessary:
1. if you have applied for and received the user certificate for the first time or you have received a new one after a renewal.
2. after a new installation on your computer
3. after a browser update (rarely).
4. if you are using multiple browsers on one computer.
Please always keep your browser up-to-date.
If you have already installed the certificate under Windows (see Installing user certificate with Windows helpcard (MYCERT-10-020)), it is not necessary to import it into the browser.
What you have to do
Please select the browser you use and into which you want to import the certificate:
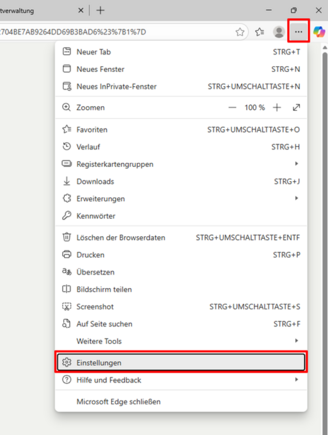
Microsoft EdgeMozilla FirefoxStart Edge and select “Open menu” – “Settings” in the top right corner (see Figure 1.1).
- 1.1
In the settings in the left-hand menu, select the option “Privacy, search, and services” then click on “Security” in the right-hand pane (see Figure 2.1).
- 2.1
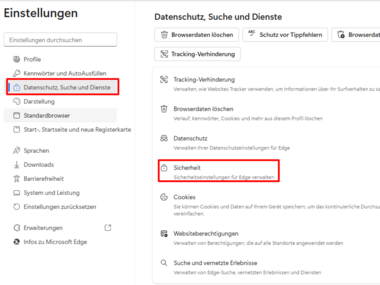 The Settings window in Microsoft Edge
The certificate is imported via “Privacy, Search, and Services.”
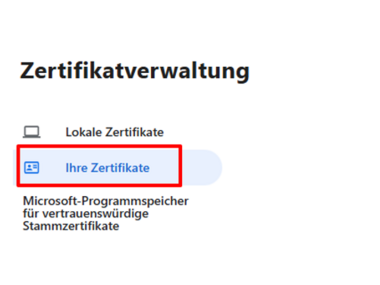
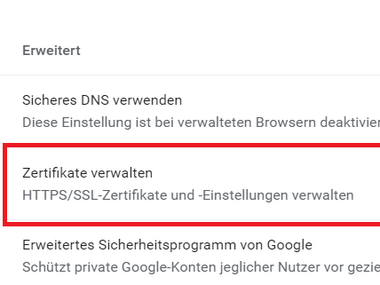
Then select the first item, “Manage certificates”.
Select the “Your Certificates” option (see Figure 4.1) and then select “Manage Imported Certificates from Windows” in the right-hand pane. (see Figure 4.2)
- 4.1
- 4.2
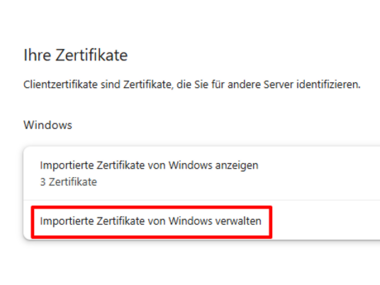
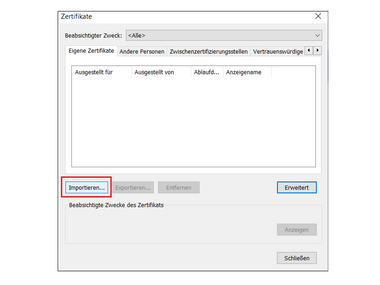
Click on the “Import...” button.
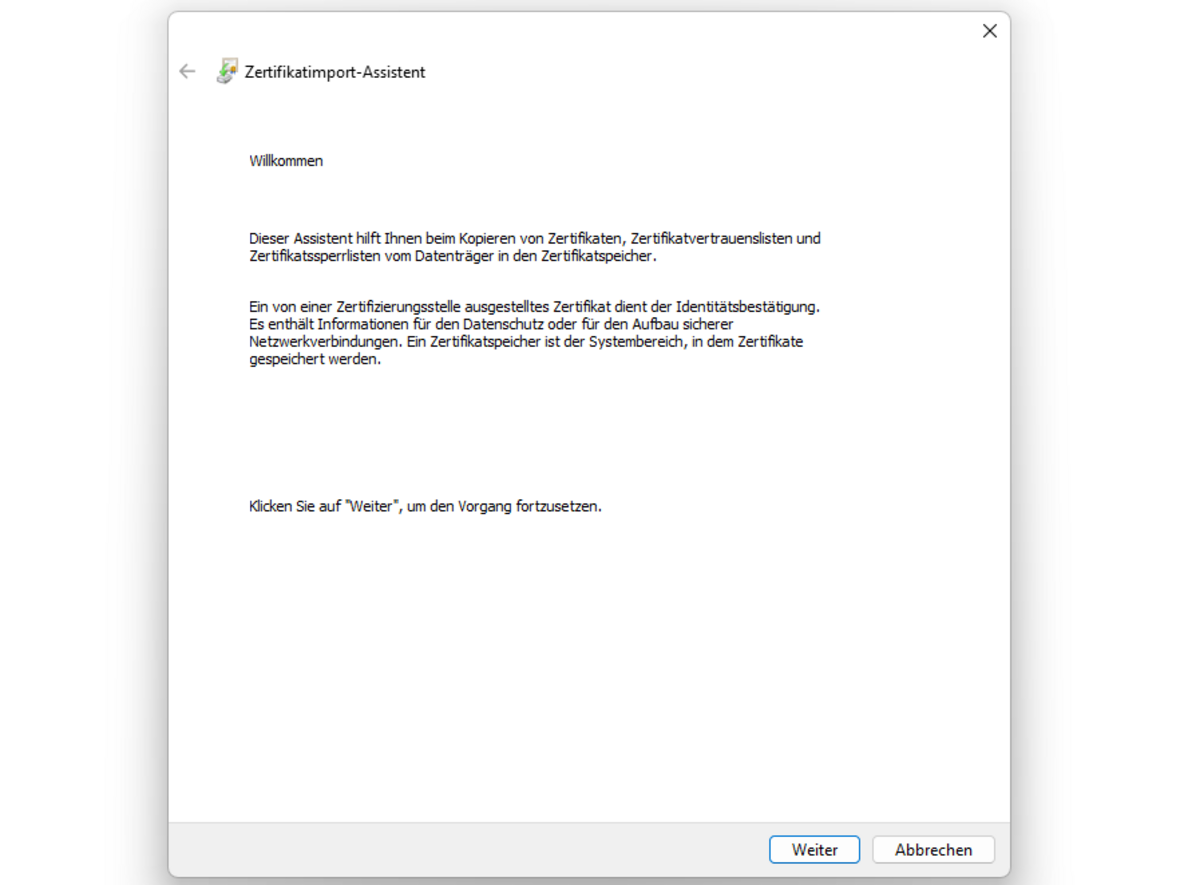
Now follow the instructions in the Certificate Wizard. (Figures 6.1 to 6.6).
- 6.1
 Certificate Import Wizard
Start view of the wizard
- 6.2
- 6.3
- 6.4
- 6.5
- 6.6
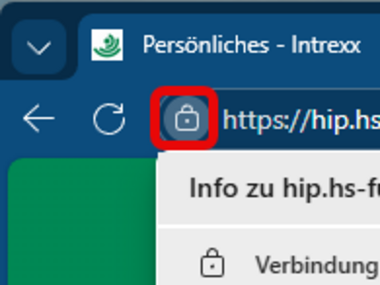
To activate the certificate (e.g., in HIP), open the service you are using and click on the lock icon on the left side of the address bar.
- 7.1
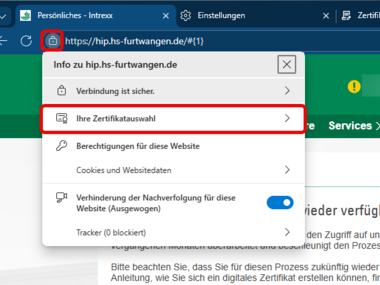
Click on “Your certificate selection” in the menu overlay and then on “Change certificate” in the following menu.
- 8.1
- 8.2

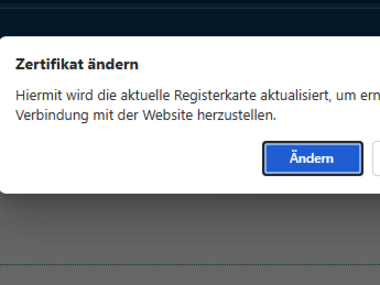
Confirm the subsequent dialog by clicking on the “Change” button.
- 9.1
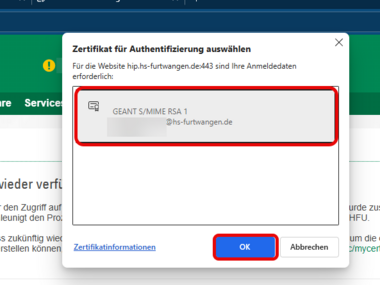
Select the available new certificate and confirm your selection by clicking “OK.”
Finally, reload the page or restart your browser.- 10.1
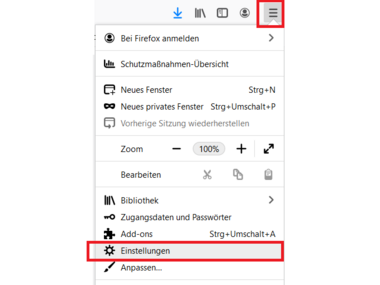
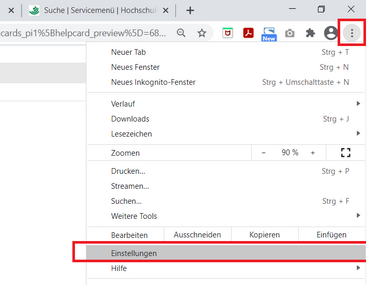
Google ChromeStart Mozilla Firefox and select “Open menu” - “Settings” in the top right corner (see Figure 1.1).
- 1.1
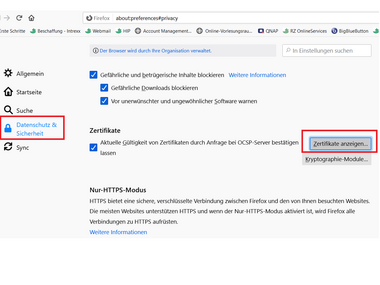
Now select “Privacy & Security” in the left-hand menu. Scroll down to the bottom and select ‘Certificates’ - “View Certificates” (see Figure 2.1).
- 2.1
 certificate management
Via "Certificates - View Certificates", you have the option to import a new certificate.
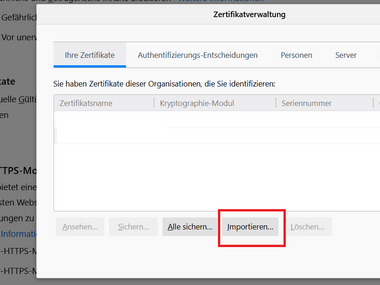
Click on “Your certificates” in the top left corner and then on the “Import” button (see Figure 3.1).
- 3.1
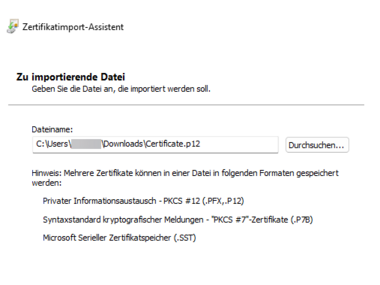
Now select the certificate file you saved (e.g., in the “Downloads” folder) and select “Open.”
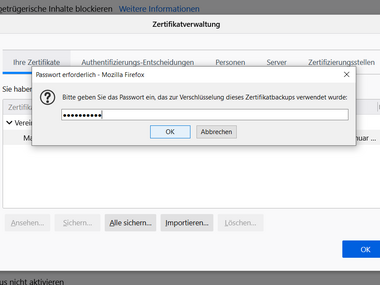
Enter the password you set when saving the certificate file (see Figure 5.1) and confirm with OK.
- 5.1
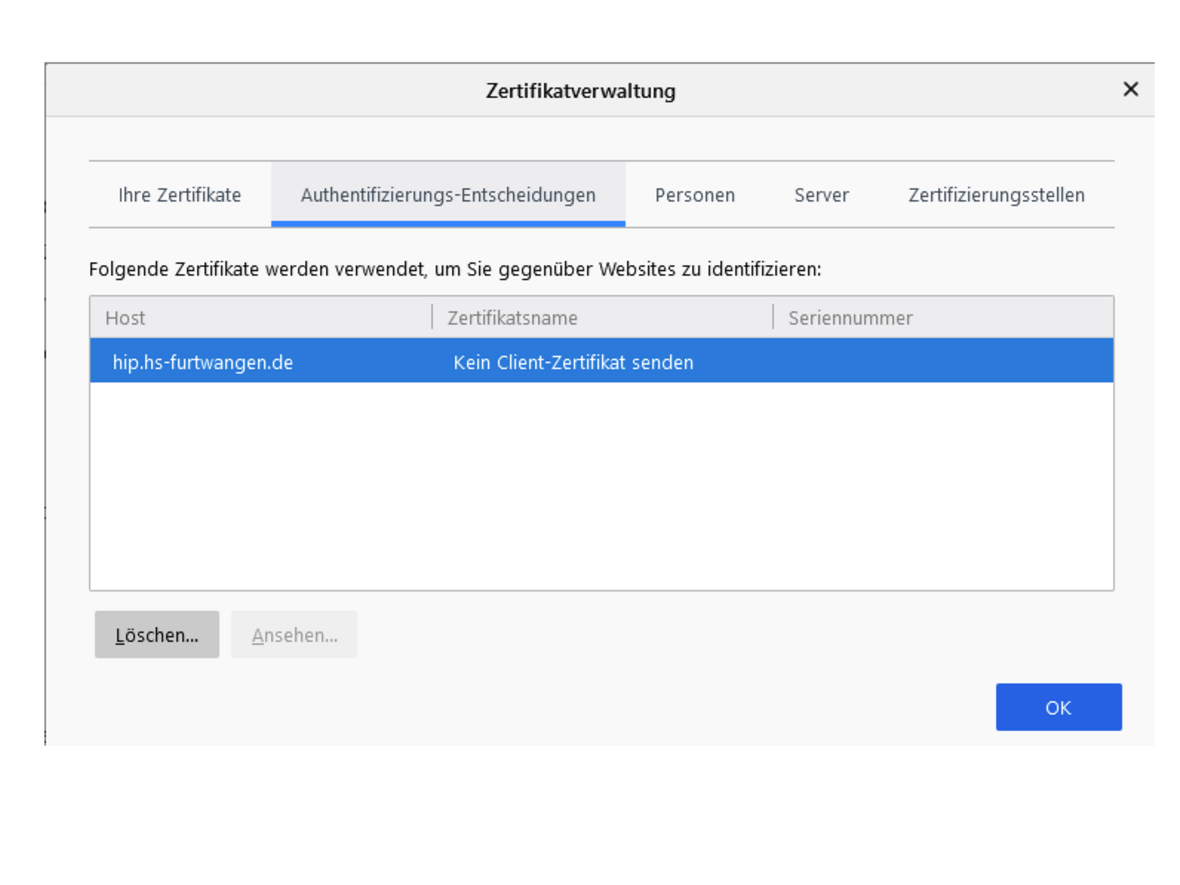
If HIP indicates that no certificate is available (yellow symbol with exclamation mark in the top right corner), this may be because Firefox has incorrectly included a block entry for hip.hs-furtwangen.de in its authentication decisions.
- 5.1
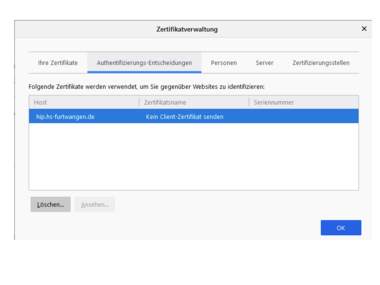 Certificate management
You can view lock entries via authentication decisions.
If you installed the certificate directly in Windows, it is already installed in Google Chrome. In that case, you don't need to do anything!
Start Google Chrome and select “Customize and control Google Chrome” - “Settings” in the top right corner (see Figure 1.1).
- 1.1
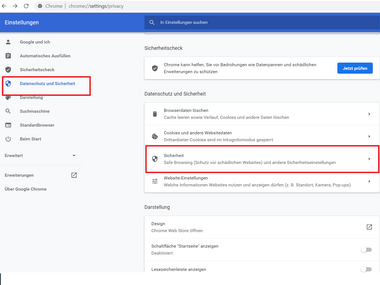
In the left-hand menu, select “Privacy & Security” and then click on “Security” in the right-hand pane (see Figure 2.2).
- 2.1
 [Translate to English:] Fenster Einstellungen in Chrome
The certificate import is done here in the menu under “Privacy and Security.”
Scroll down and select “Manage Certificates” (see Figure 3.1).
- 3.1
Follow the instructions by clicking “Next.” Now select the “Import” button (see Figure 4.1).
- 4.1
In the window that appears, select the saved certificate file (e.g., in the “Downloads” folder) and then click “Open”.
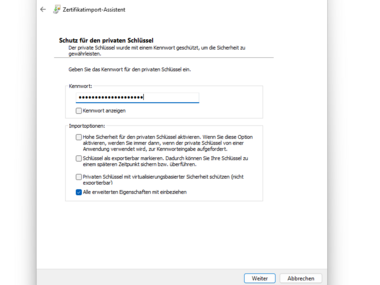
Confirm with “Next” and enter the password you set when creating the certificate file under “Protection for private key”.
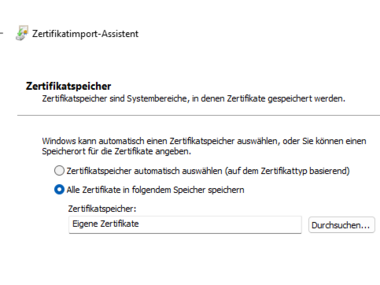
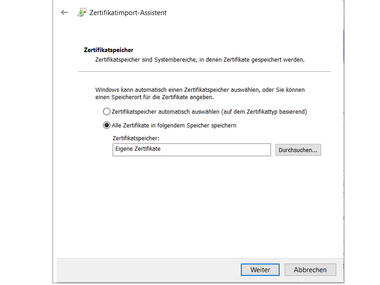
Under “Certificate store” select “My certificates” and confirm by clicking “Next” (see Figure 7.1).
- 7.1
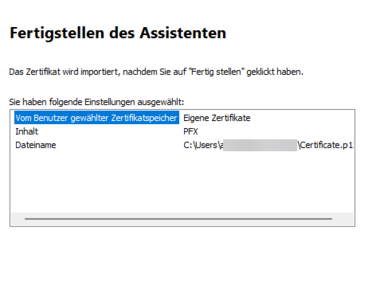
Finally, click on the “Finish” button.
- 8.1
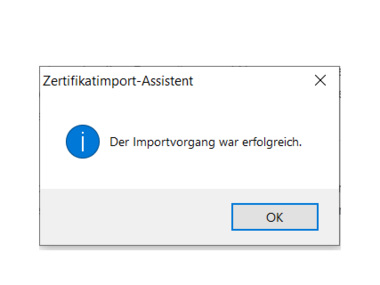
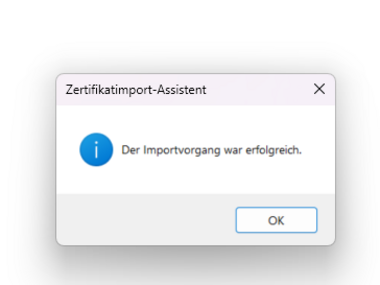
Confirm the message by clicking “OK.”